Introduction
This guide walks you through two ways to get started with MultiBaas:
-
Sample App Quickstart - Set up and run the MultiBaas Sample App, which demonstrates how MultiBaas simplifies interaction with EVM smart contracts. You can use it as a learning tool or as a scaffold for building your own dApp.
-
Link a contract to MultiBaas - Link a pre-deployed smart contract to MultiBaas for interactive calls, state visibility, and live event tracking.
Sample App Quickstart
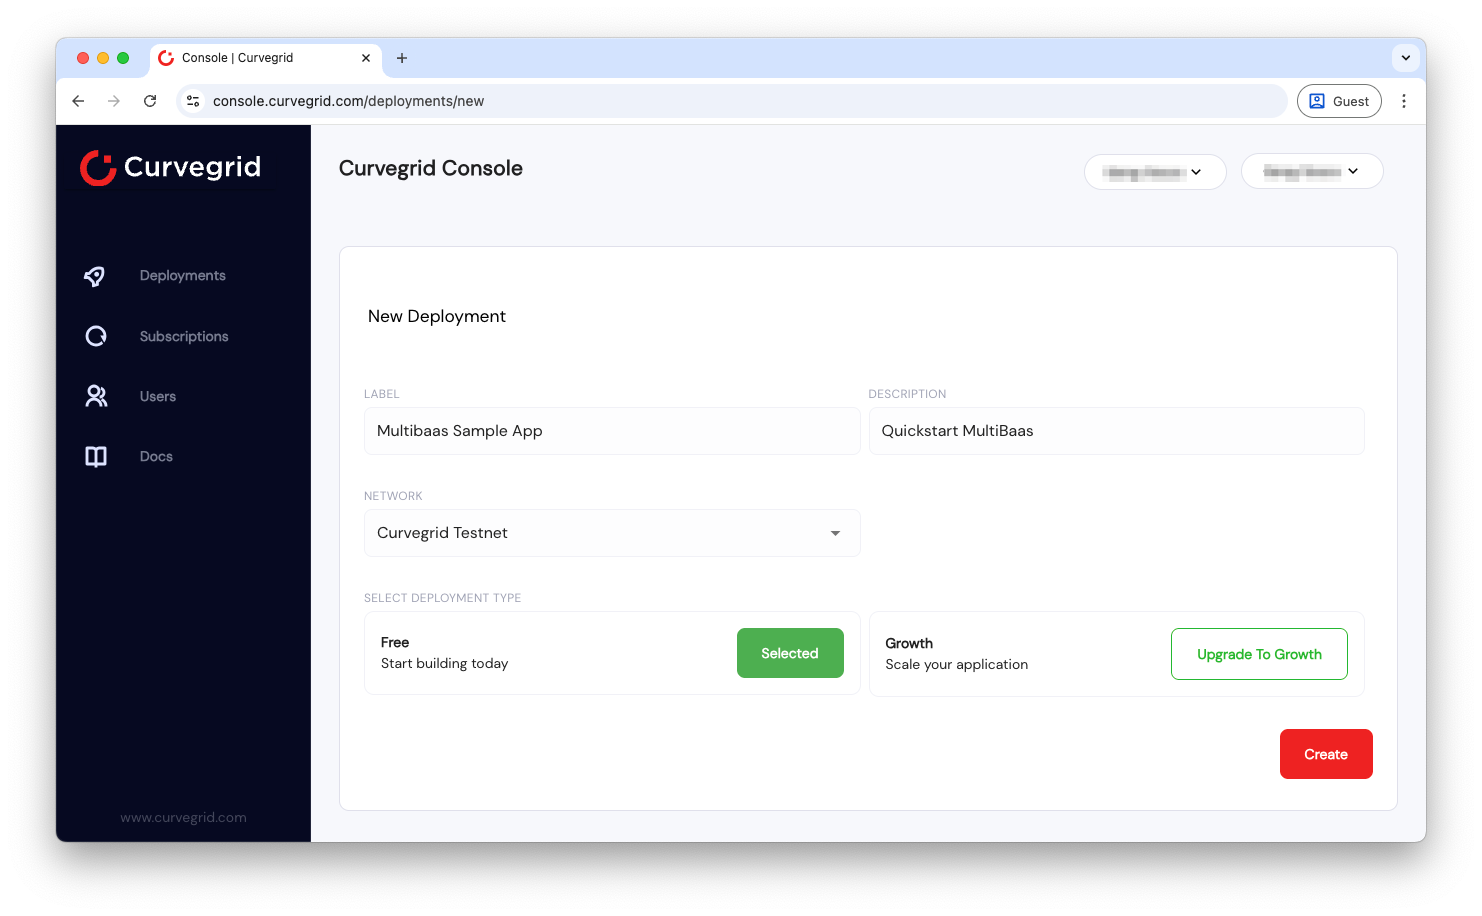
Create a deployment
Go to console.curvegrid.com, sign up, and create a MultiBaas deployment on your network of choice. We recommend using the Curvegrid Testnet network due to its near-instant block finality and easily accessible faucet for account funding.
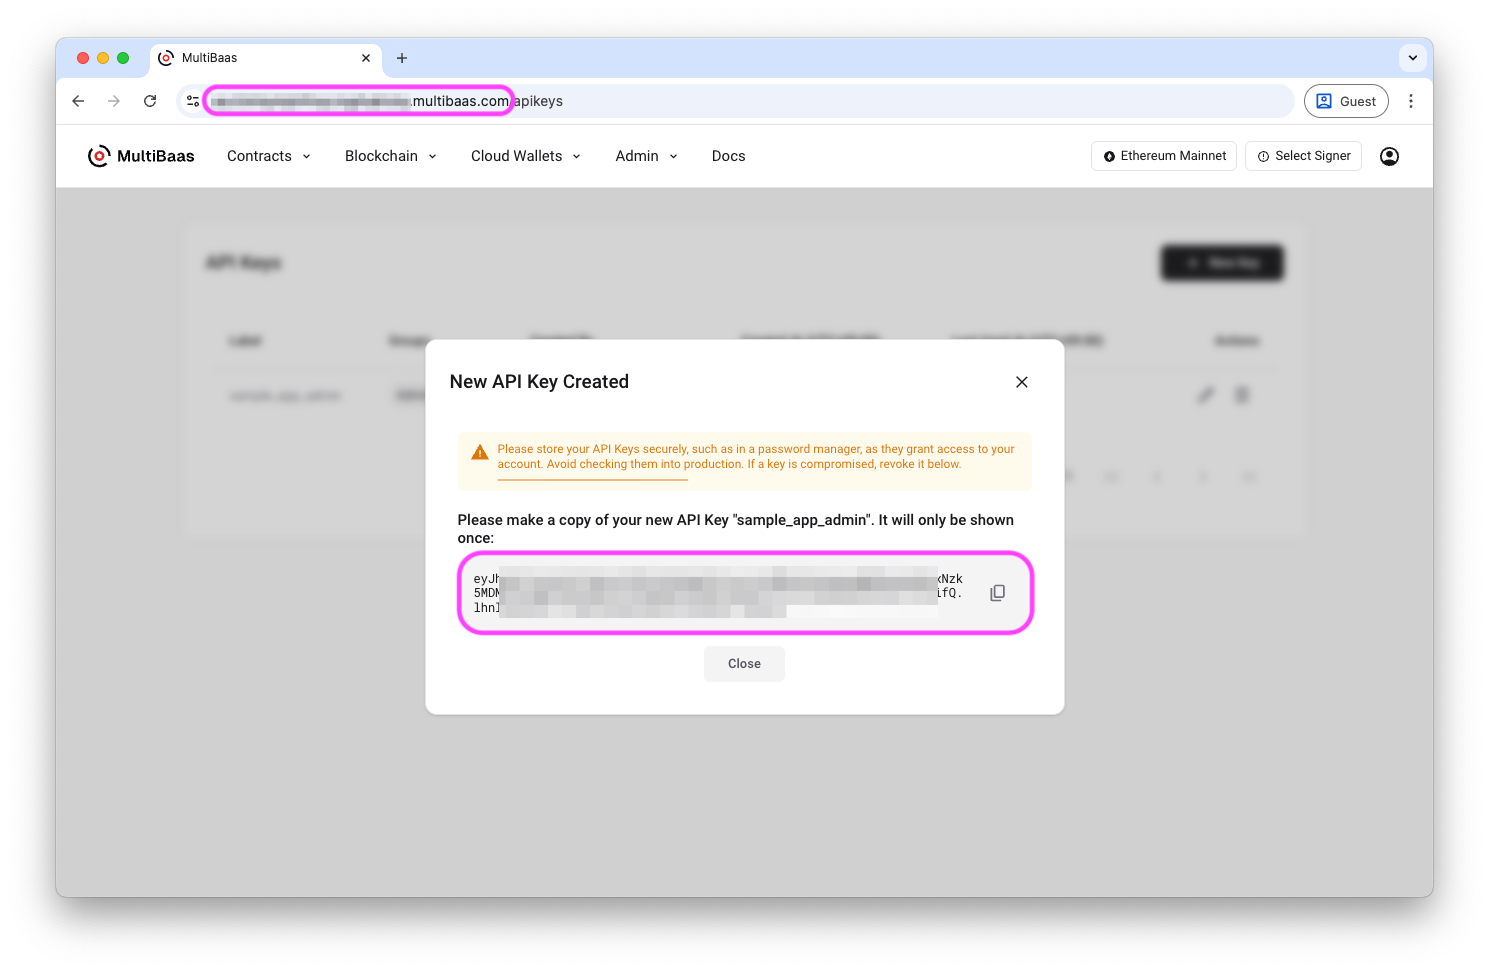
- Create your API Key
Go to Admin > API Keys > New Key and create a key with the label "sample_app_admin" and select "Administrators". Copy and save the API key and deployment URL.
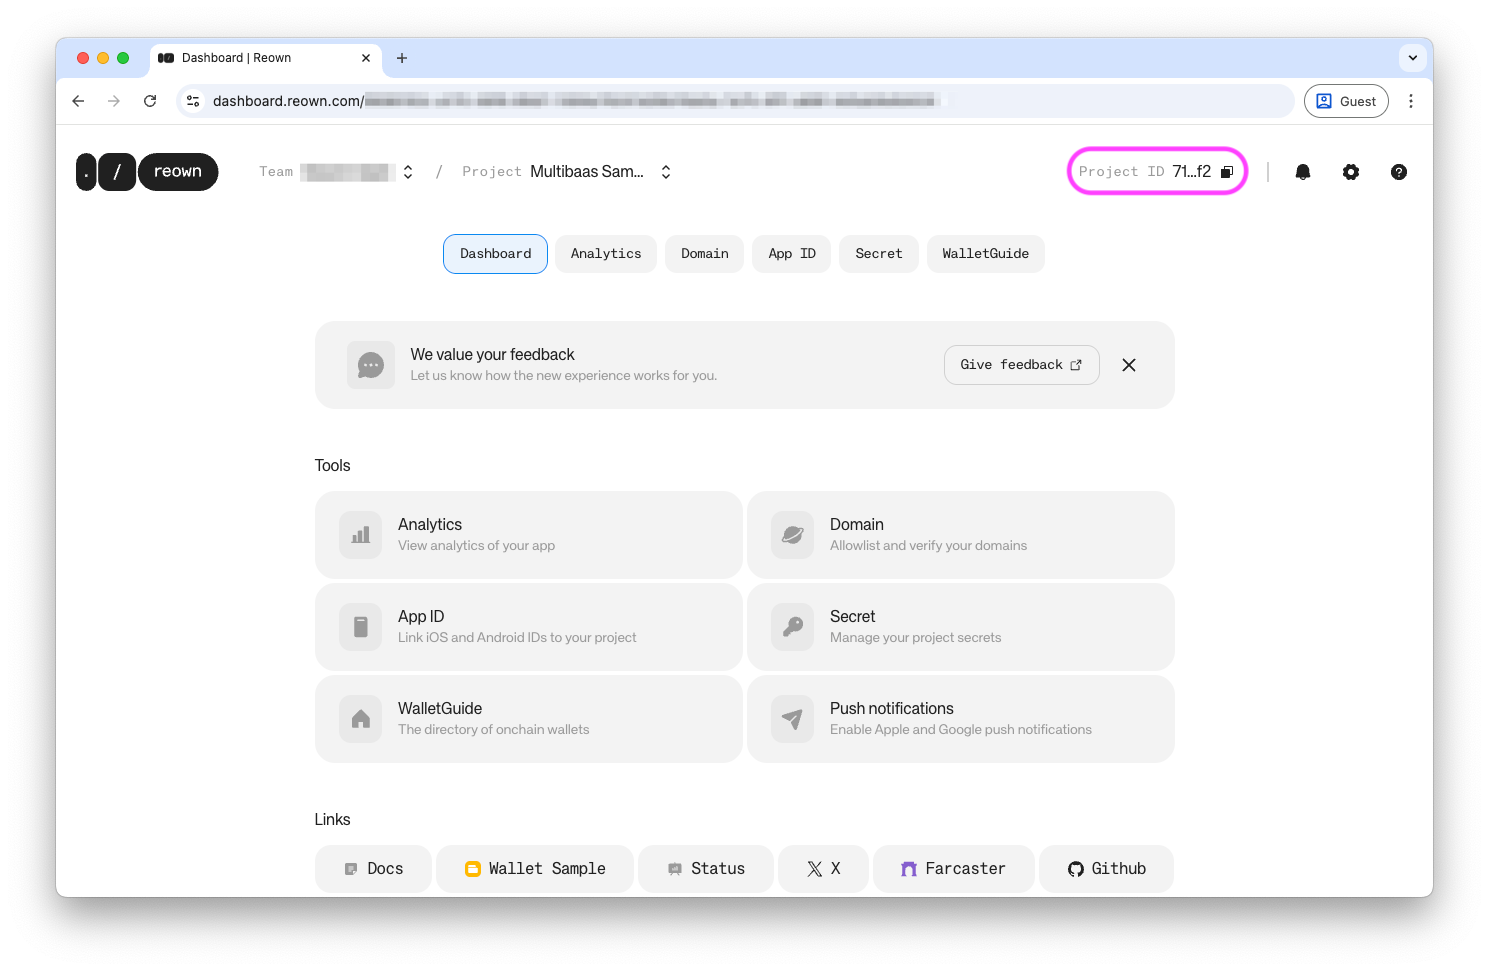
- Create your Reown project
The application uses RainbowKit to link your wallet.
Go to cloud.reown.com, sign up, and create a new project with the name "Sample App". Copy and save the Project ID.
- Install the application
Clone the sample app repository and follow the installation steps as prompted:
git clone https://github.com/curvegrid/multibaas-sample-app.git
cd multibaas-sample-app
npm install
- Deploy your local application
After installation, you should see the following completion message:
#### Configuration complete 🦦 ####


To deploy the voting contract:
cd blockchain
npm run deploy:voting:dev

To run the frontend server after deploying the contract:
cd frontend
npm run dev
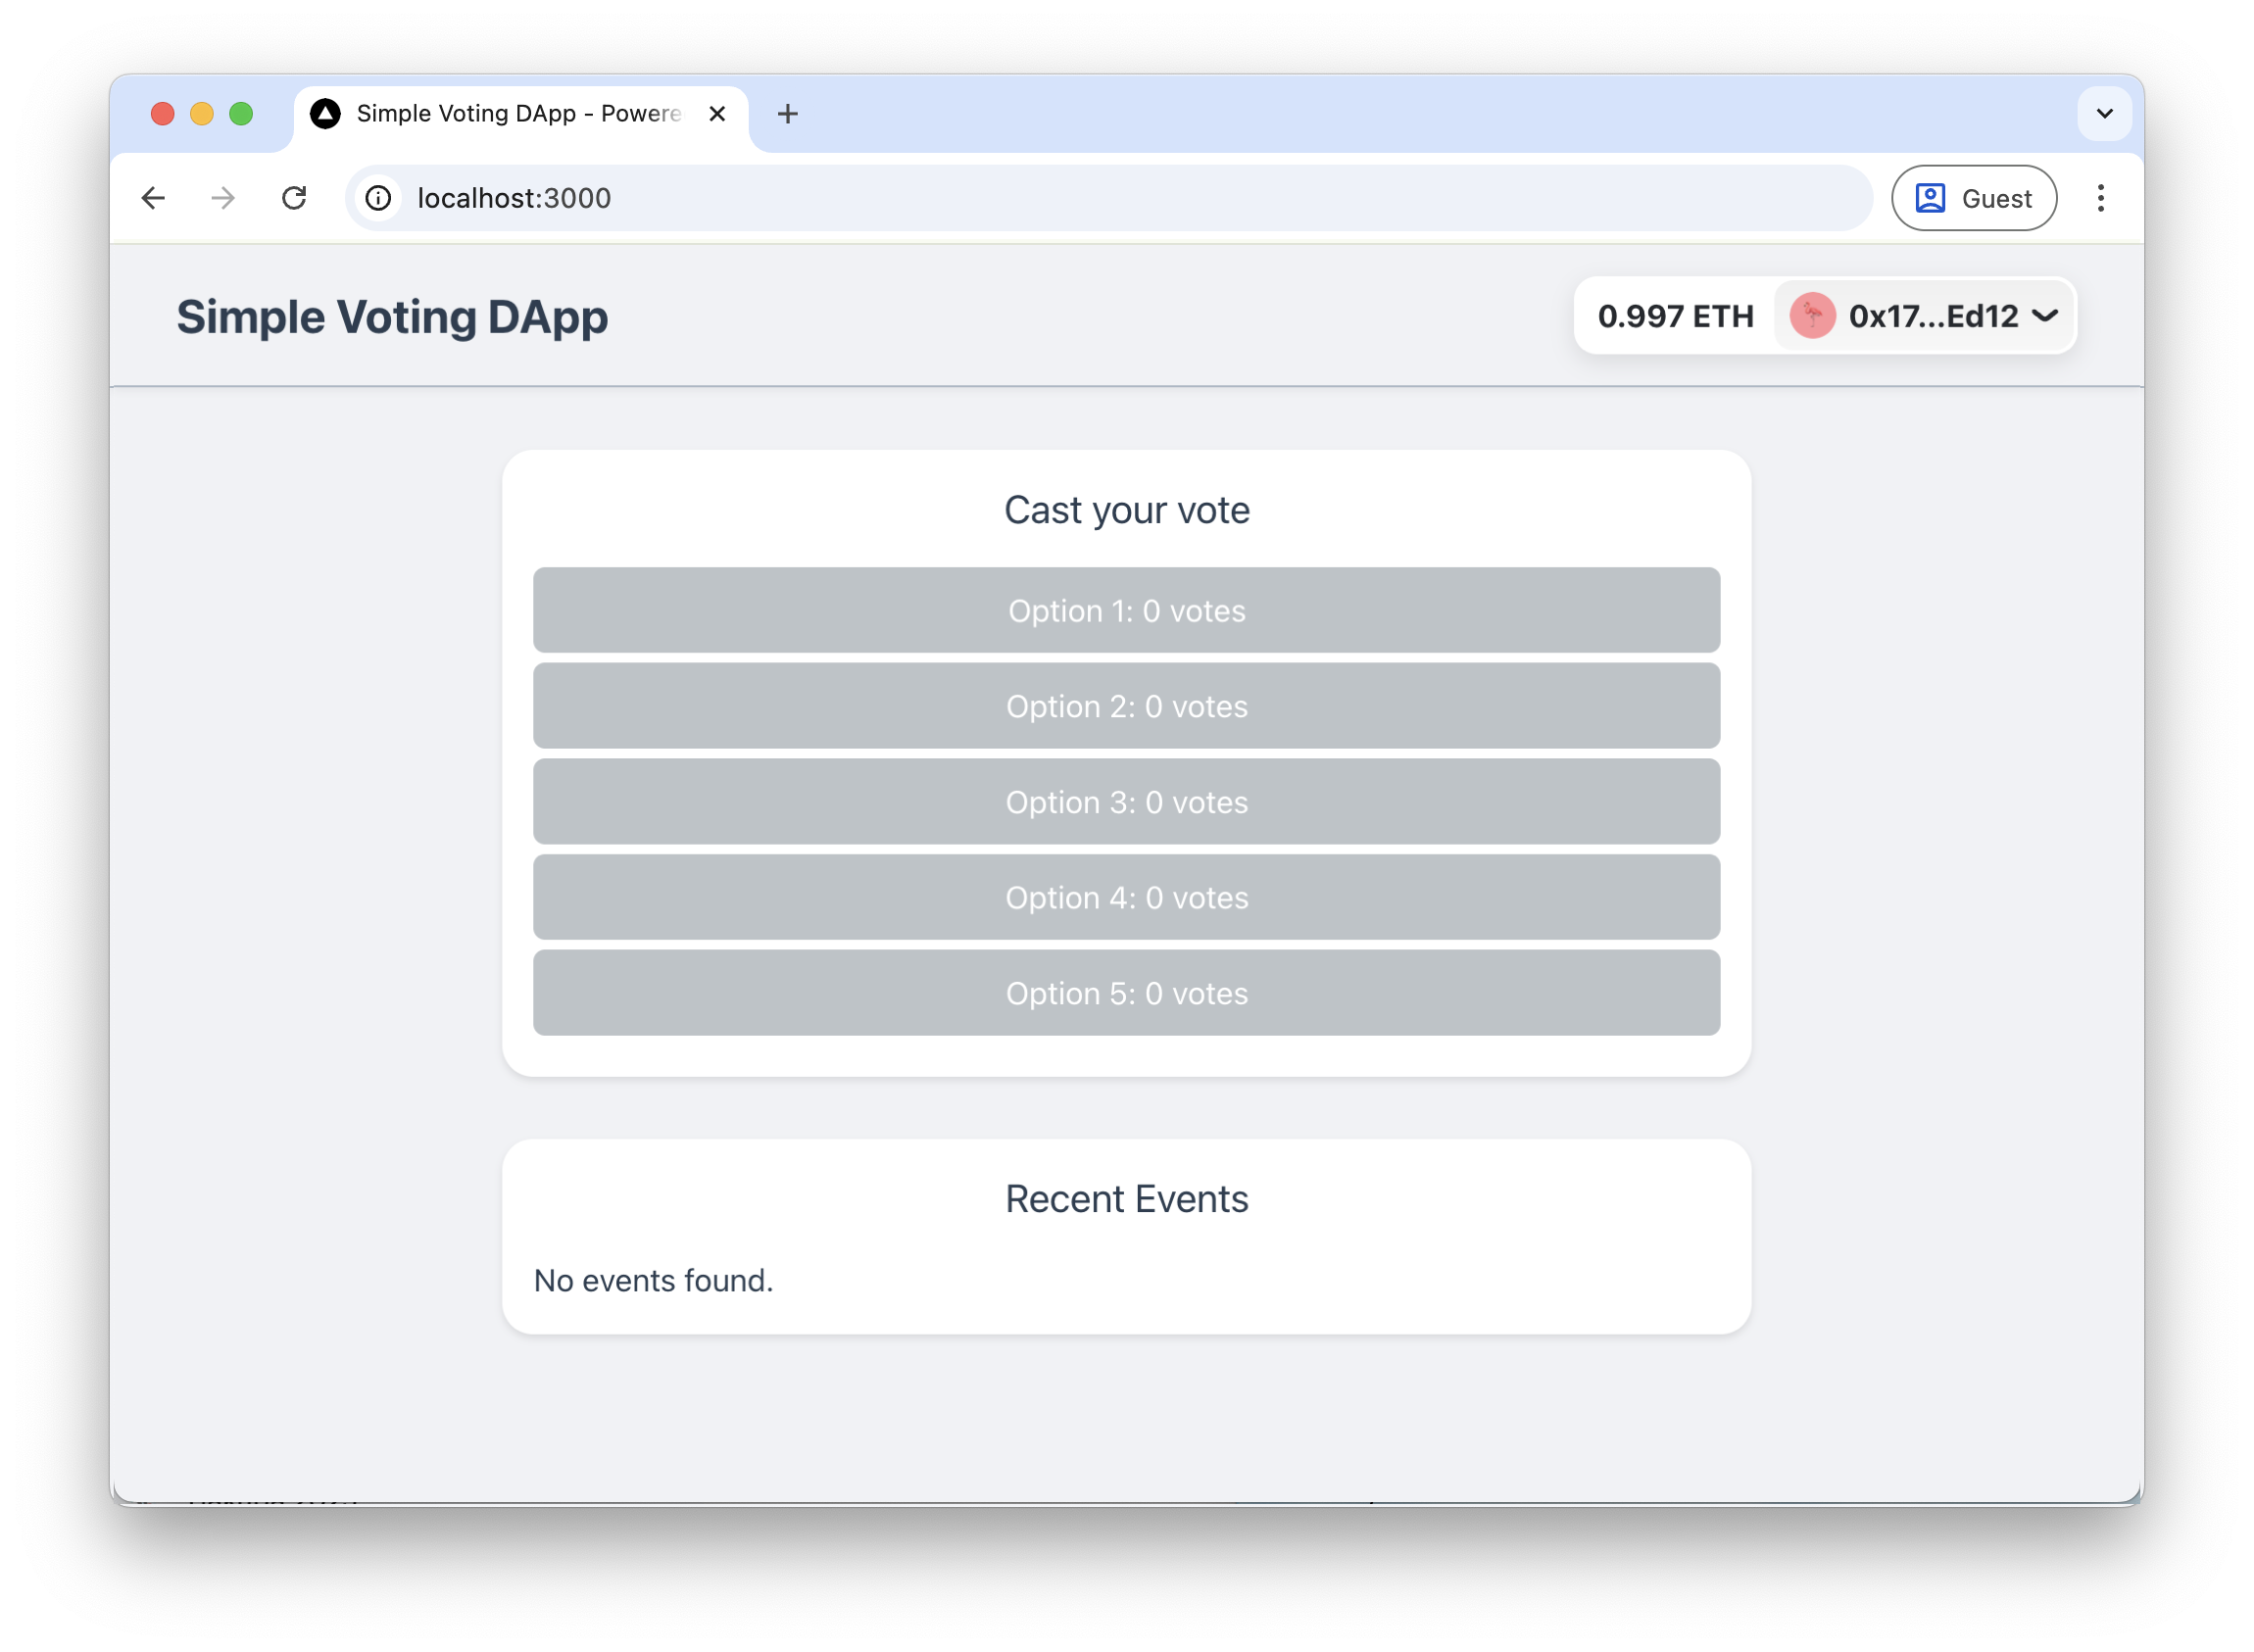
Continue following the prompt to deploy your voting contract and start the frontend server. Then, navigate to http://localhost:3000/ in your browser. Your app should look like this:
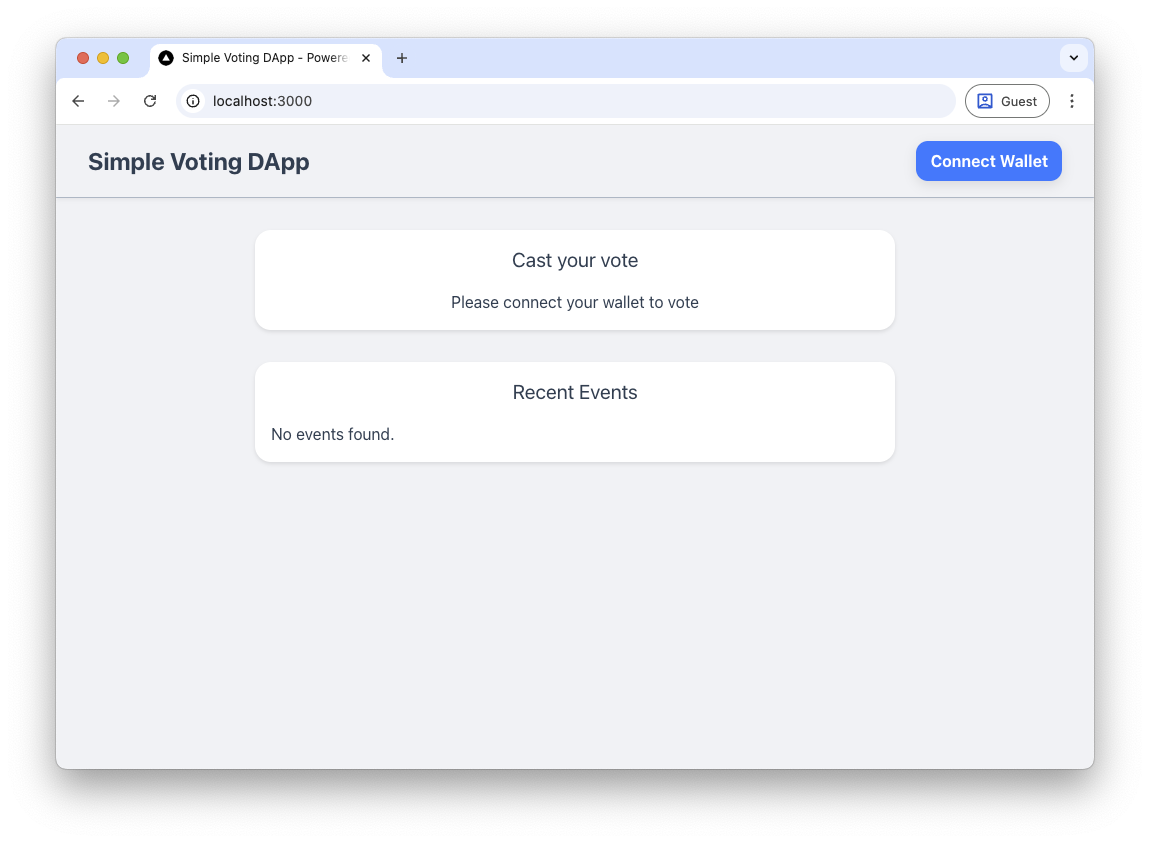
Connect your wallet to start interacting with the deployed contract:
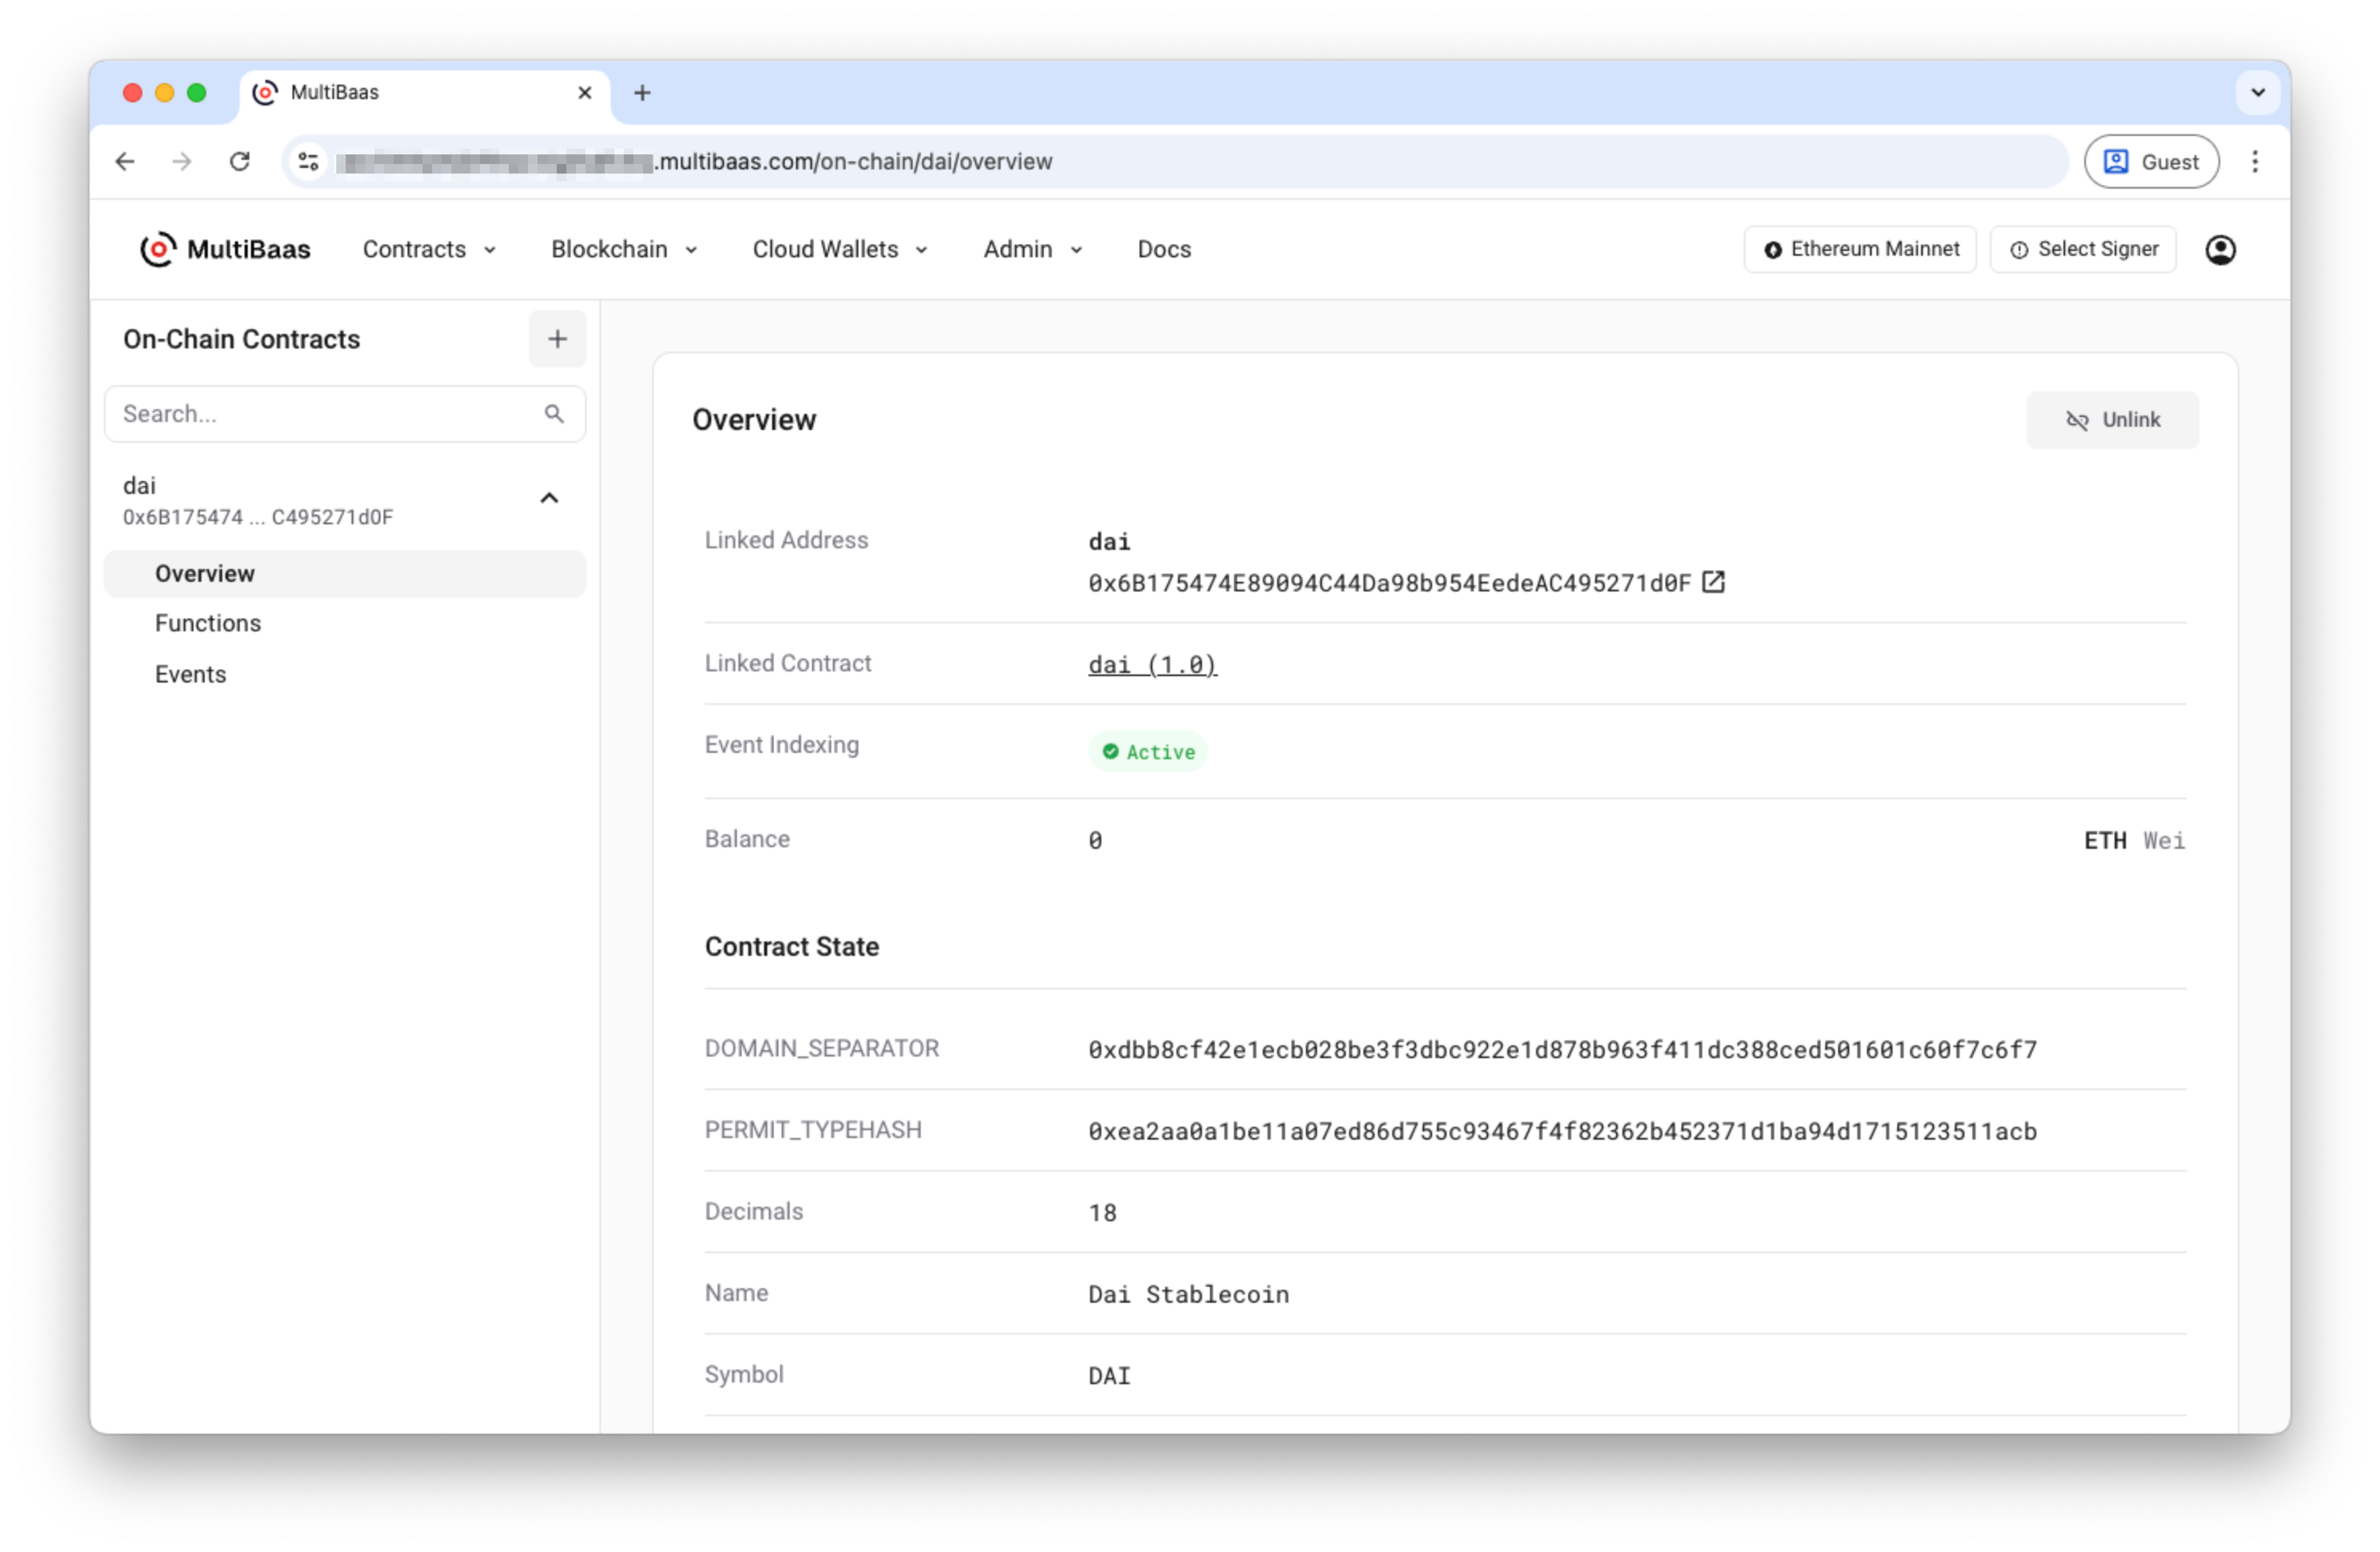
Link a contract to MultiBaas
Whether you want to extend the sample app with an additional contract or simply connect to one already deployed, MultiBaas provides an instant UI to inspect state, call functions, and monitor events along with other key features.
Make sure you have already created a deployment.
Note: You will need a Multibaas deployment on the same network on your chosen contract.
-
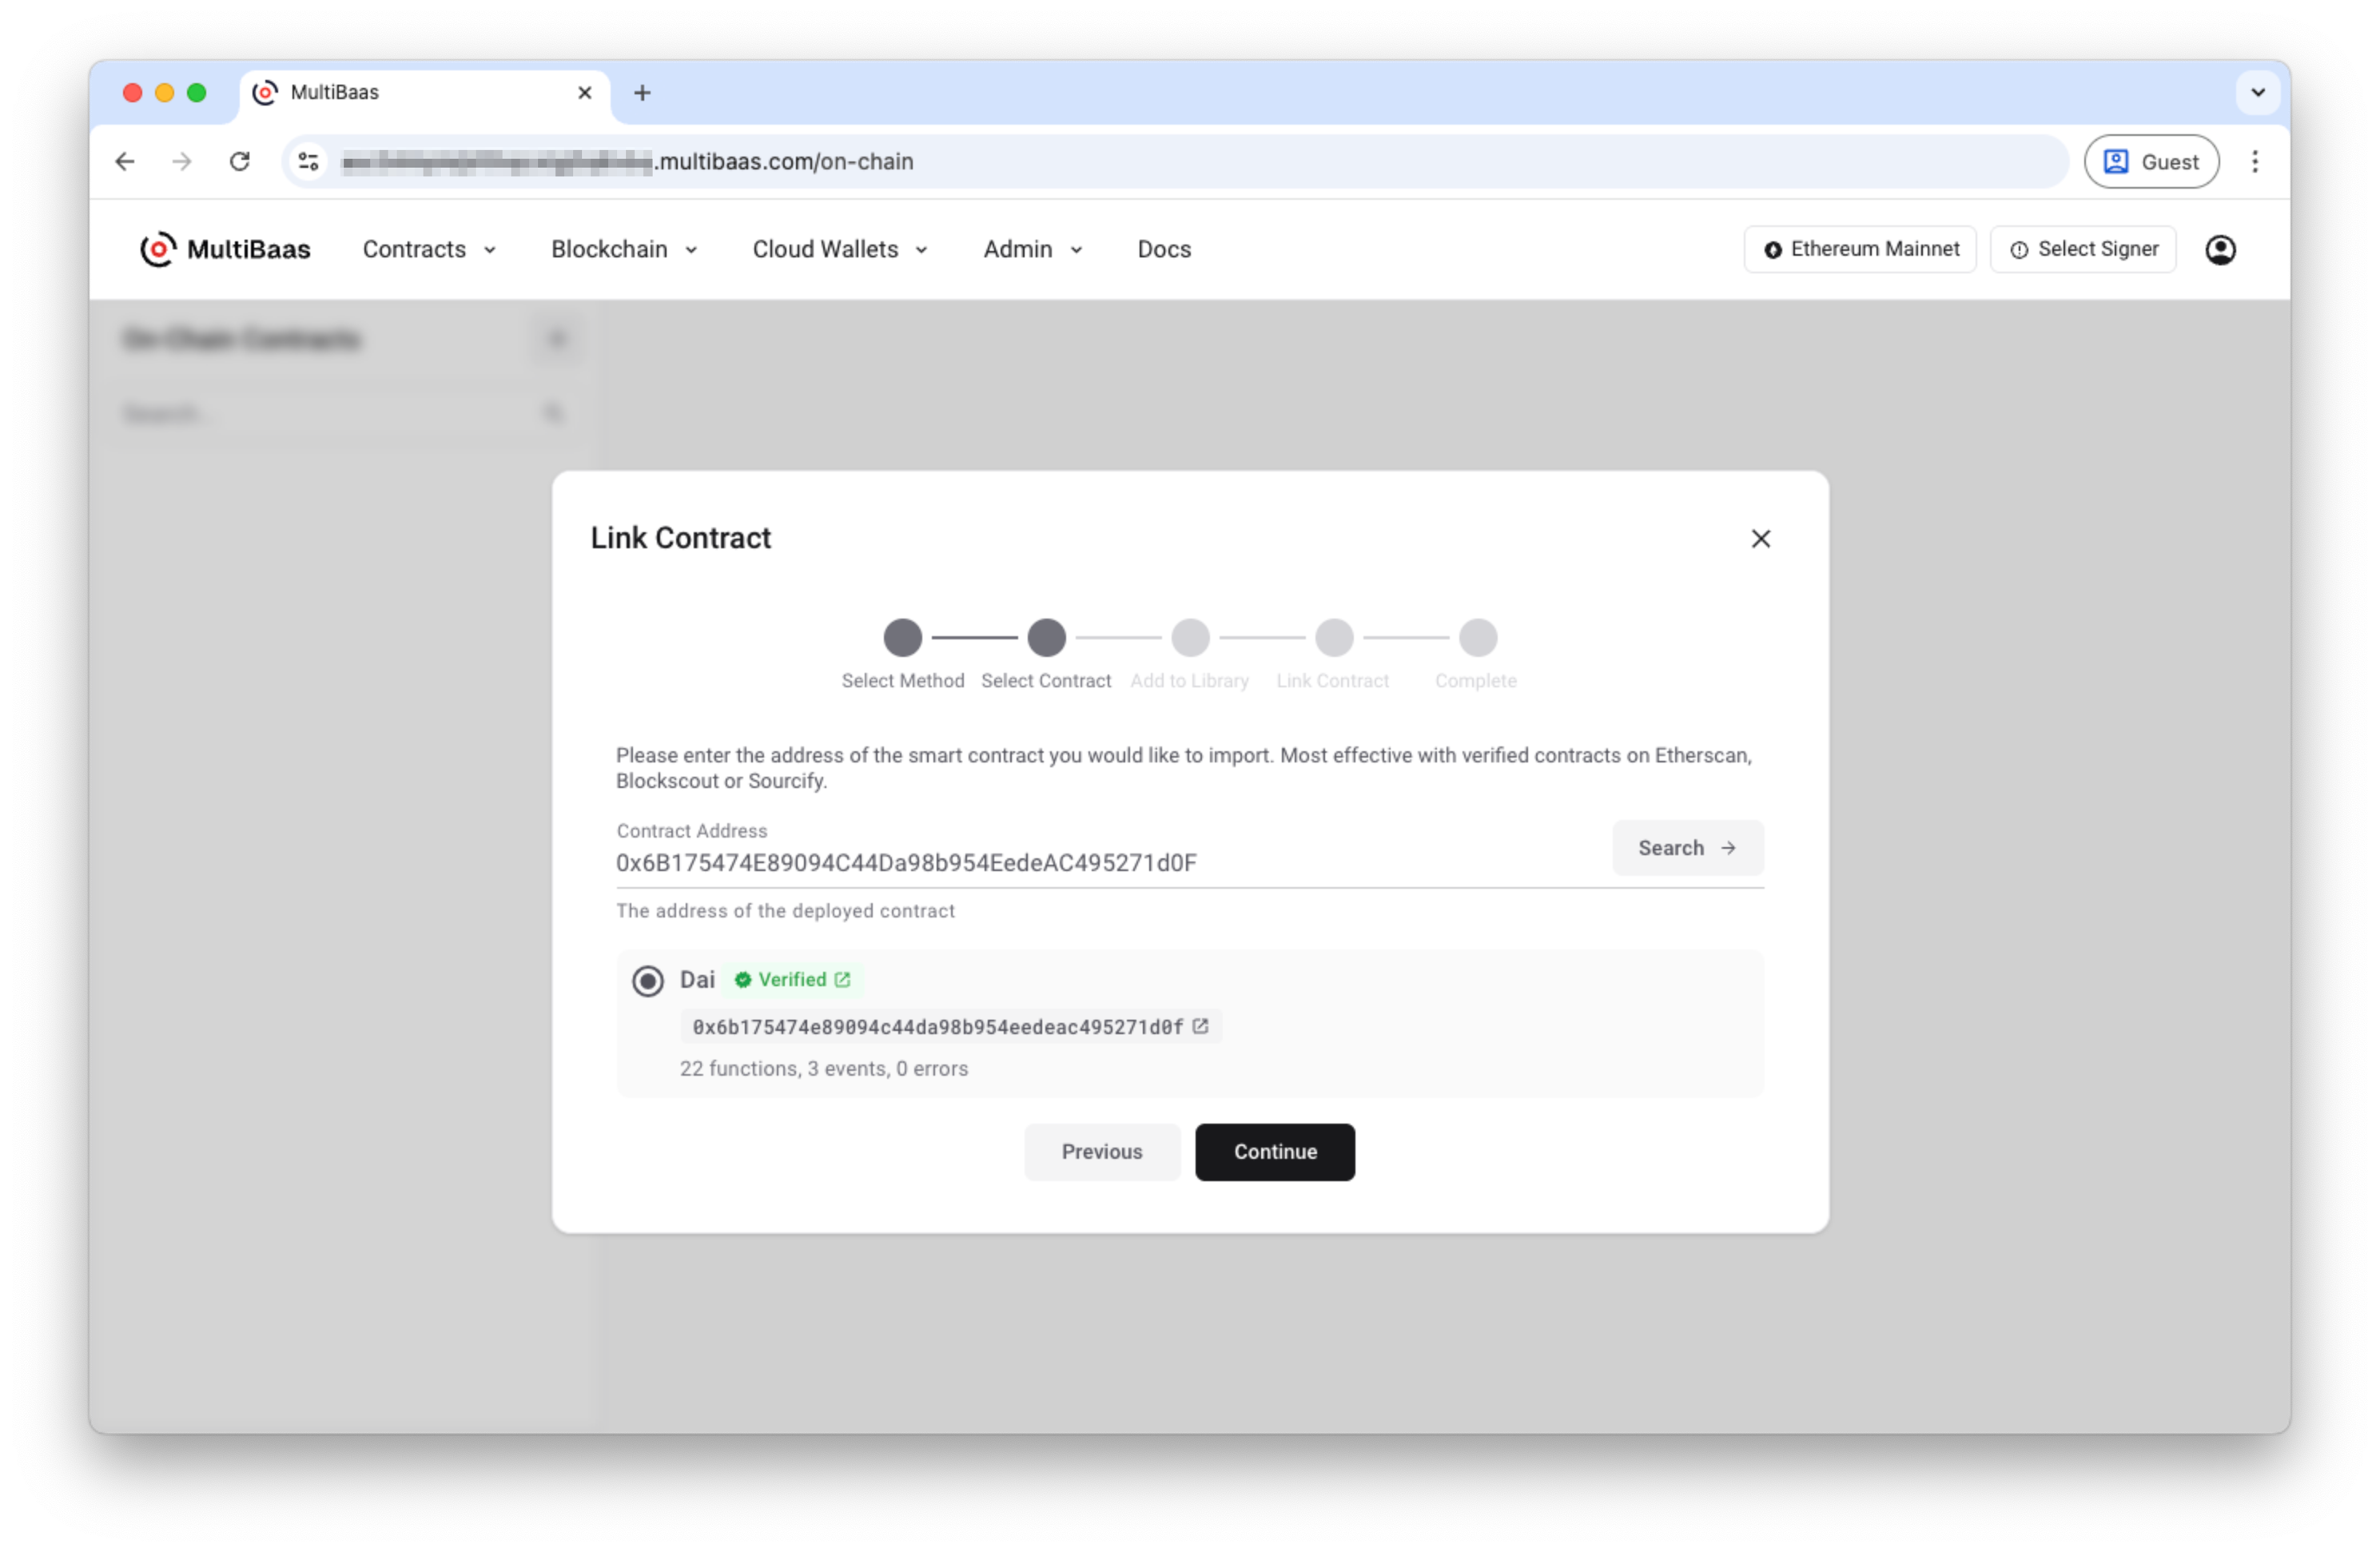
Navigate to Contracts > On-Chain and click on the plus icon in the left sidebar.
-
Choose Link Contract > Contract from address. This is the simplest way to add a pre-deployed contract; it works best with verified contracts on Etherscan, Blockscout or Sourcify.
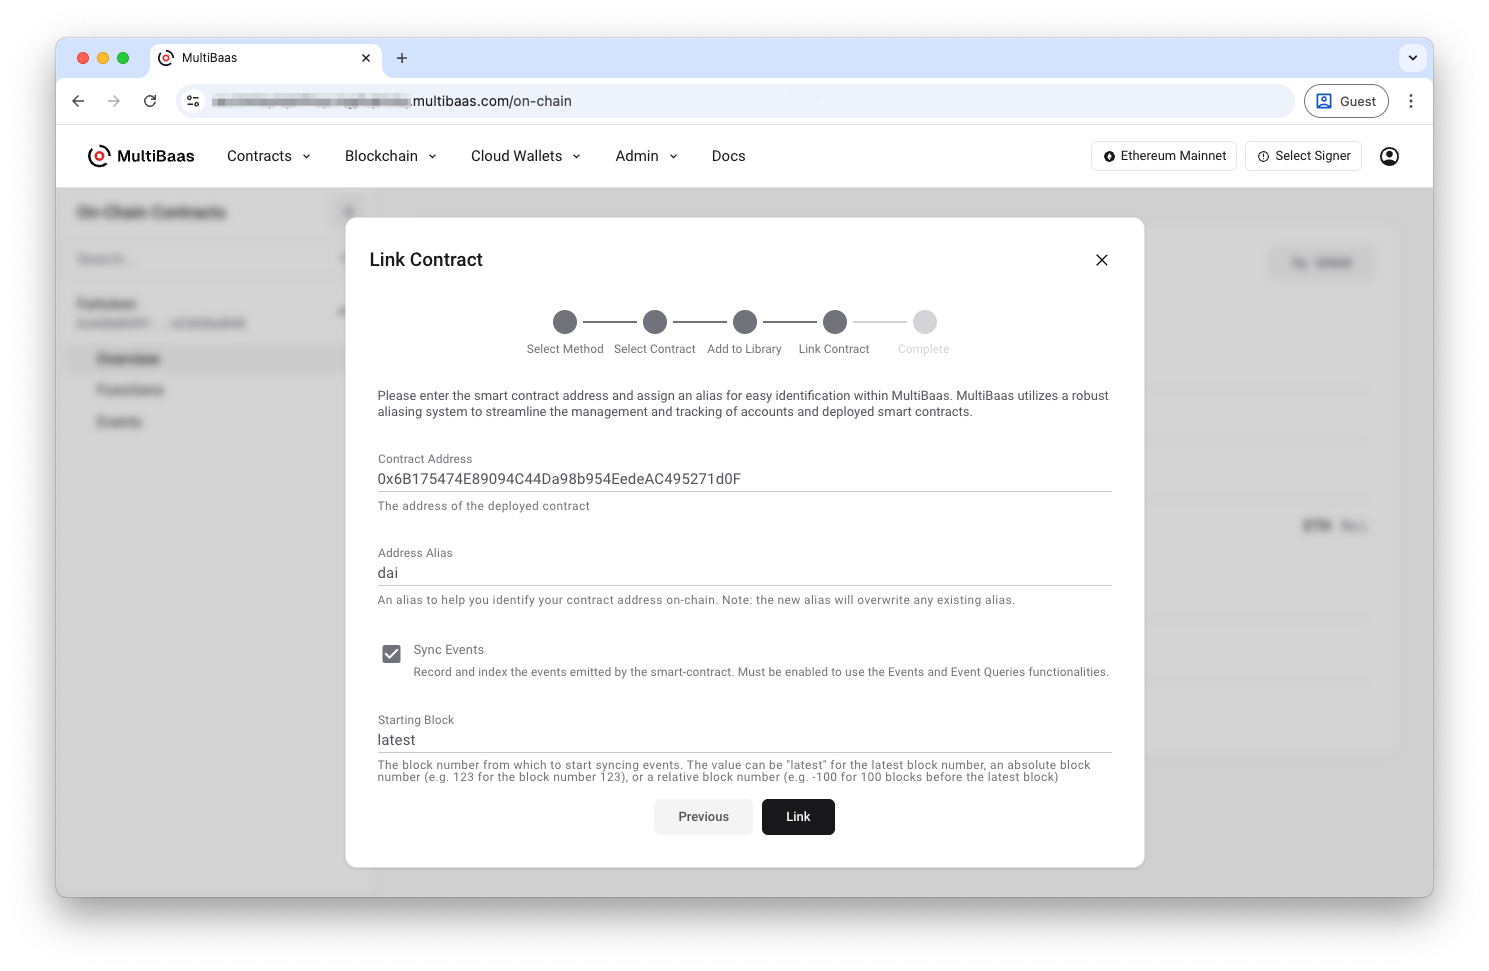
- Complete the wizard by first adding the contract code to your library, then entering the pre-deployed contract details. To monitor events, enable Sync Events and select a Starting Block.
Once your contract is successfully linked, you should see the following confirmation message in the modal:
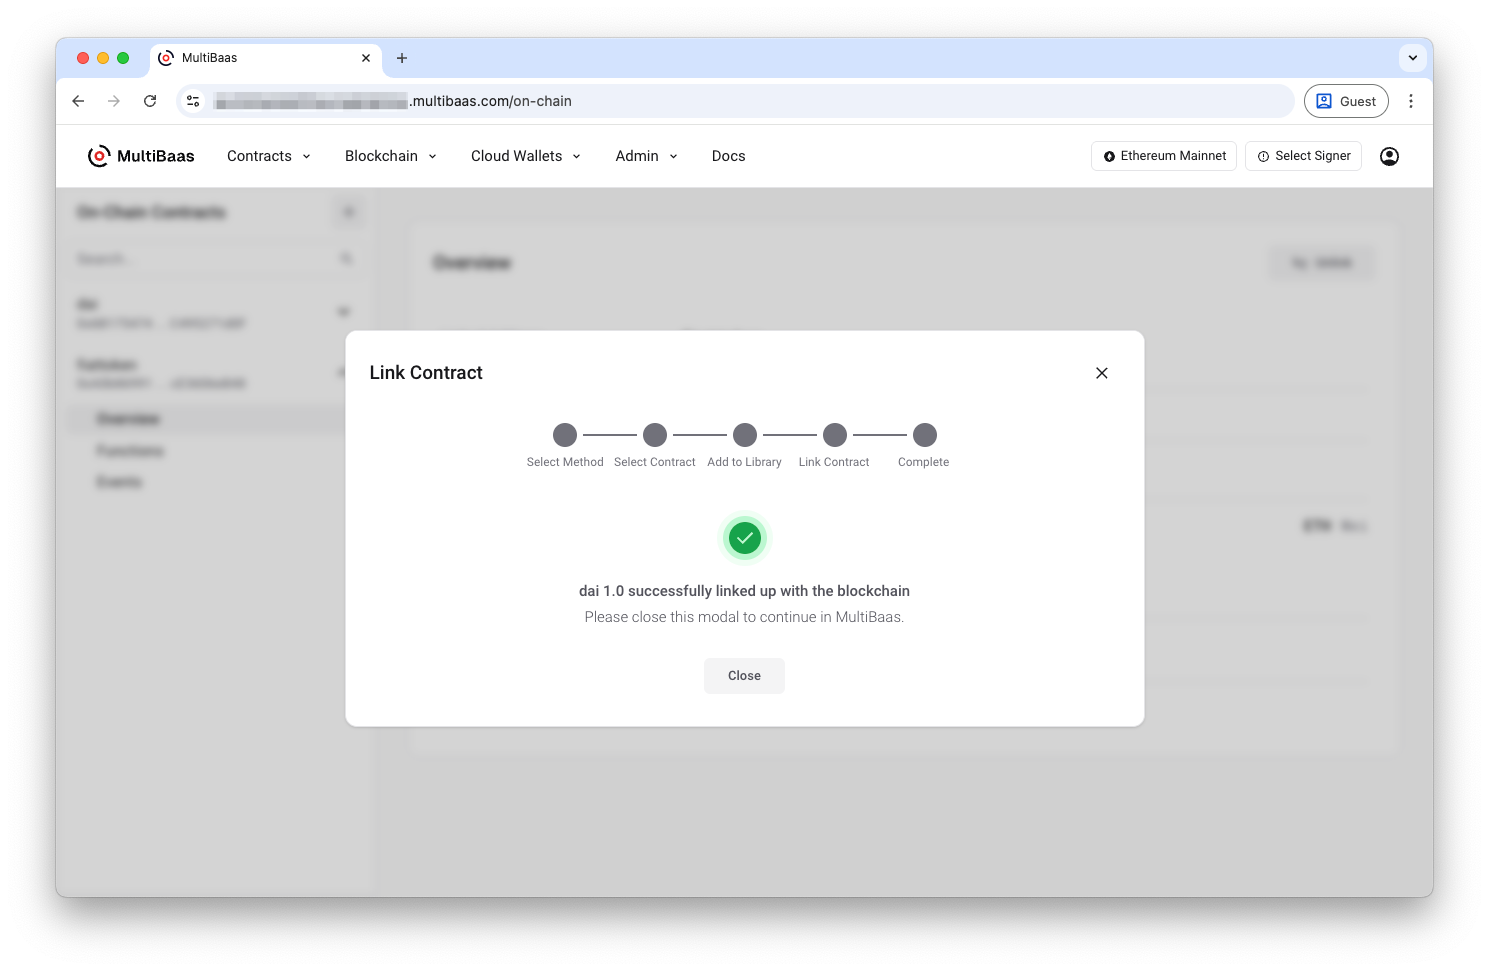
- After closing the modal, you will be redirected to the overview of your newly linked contract. From here, navigate using the side panel to explore the contract state, call functions, and monitor events.
Congratulations! You’re all set to start building your project with MultiBaas.